Quilt of Love Progress

6 out of 9

Blocks received as of 10/03/2011


Saturday, May 28, 2011

Please, please don't eat the Daisy's

The title says it all.. Oh, what does it mean? Well I honestly have no clue, except that it's a song my mom sings all of the time!
Please, please don't eat the daisy's
  Don't eat the daisy's
   Please! 
Just watch the trailer below and you will understand.  (The movie actually looks quite entertaining too)

Ok, so now that you have had a laugh, what's the point? I have continued my project for my mom, and yes I know it's late for Mothers Day. I gave her the place mats on Mothers Day, but then I didn't know how I wanted to do the napkins...
 
So, this is what I decided on.
 It's got daisy's, it's got ribbon, it's even got monogramming, what else do you need?
 So what do you think?

What the turtle is SUPPOSED to look like...

Thursday, May 26, 2011

A completely unproductive Thursday

Well, in terms of projects worked on/completed, I did nada!  However, I have enjoyed spending the day reading wedding magazines and looking at a dozen venues. So many choices!!

Wednesday, May 25, 2011

A busy Wednesday

I made this pinwheel for my second quilt.  Something changed my mind from the four triangles of different fabric to making 8 small triangles of only two colors.  It looks like it took a lot more work, but if I'm being honest it was super easy.  I watched a video on making pinwheels where they put two charm pack squares together right side facing in.  Then sewed along the outside ( I know, this just seems all kinds of wrong).  After you make two diagonal cuts (giving you 4 triangles), you open up the triangles and wha-lah! You now have the four squares needed to make a pinwheel.  I think I will use these for the four corner's, but for everything in between, I will use a block that I have to thank Miguel for (yes, he actually came up with it). See, usually when I take something to him and ask him what he thinks, he just gives me that look.  You know, the one that says "what in the world gave you the impression that I would ever have an opinion on something like that". But this time, he surprised me by rearranging the squares to make this design:


I know, I was shocked too! Who knew he had it in him...

I also made another small change to the original design.  On the center square I am going to do some (fuse quilting?) not really sure what it is called, but it looks like this:


The ribbon is supposed to look like a river, which will work to match a picture I have hanging over the wall with the designs of the quilt (I hope).  Here's one last picture of the squares that I finished yesterday...

Monday, May 23, 2011

A quilt for myself

Ok, so now I will begin my second quilt attempt.  It's a lot larger than the baby quilt, so I expect many more problems.. Should be fun!  I want to make a quilt for our guest room, which has a twin size bed.  Here are my design spec's and charm/cake squares.  I'm going to cut everything down to triangles and put those together to make squares.  This will give me 10 charm pack squares and 20 cake squares that will all come out to 8"X8" blocks (conveniently).  I am also using a big piece of vintage white fabric that I love.  I just have to go to the store to buy some brown to use between the blocks (I believe this is what they call sashing), and a solid color to use in four places that I didn't have enough blocks for. 

Sunday, May 22, 2011

Towels for Becky

New Project Alert
Today I am going to work on digitizing an image that my sister drew so that I can put it on hand towels for her. 

Wednesday, May 4, 2011

Mother's Day mania! Step 2

I think I will design it like this.  The square will actually be even when I digitize the image.  I am thinking that I will do bright colors in the square and put them as a border across the napkins and just one in the corner of the place mats.  Or flip it around and have one on the napkins and a boarder around the place mats.  We will see which one is easier and prettier...

Mother's Day mania!

Since this blog is brand spankin' new, I feel confident is posting about my mom's gift for Mother's Day.  She doesn't know anything about this blog yet, and I am pretty sure she won't stumble across it.  I don't think she even reads blogs.. Ok, so here's the plan.  My mom LOVES entertaining guests.  She also LOVES all of the decorative house linens one would put in their house to look cute for guests.  She buys hand towels for every season and holiday, literally. She also LOVES daisy's.  From this I formed the idea of making her some place mats and napkins because I don't think she has any with daisy's on them. Or I hope she doesn't... So I went to the store today and bought these supplies:
 And here is a quick shot of my energetic, helpful puppies.

I'm not sure yet if I am just going to put embroidery on the place mats, or something else.  Now I need to go work on them and draw out an image to embroider. More to come soon!

My first Quilt

Since this is my first post, I thought it was only fitting to use it to show off my first quilt. 
This quilt really represents ups and downs for me.  It was a trying accomplishment!  Since I finished it BEFORE I started the blog I am already breaking my Process Pledge (where I explain it), but I think this is excusable this one time. Or at least I hope, please process pledge watchers don't prosecute me!  I have to throw caution to the wind here, though, because this quilt came out so adorable!
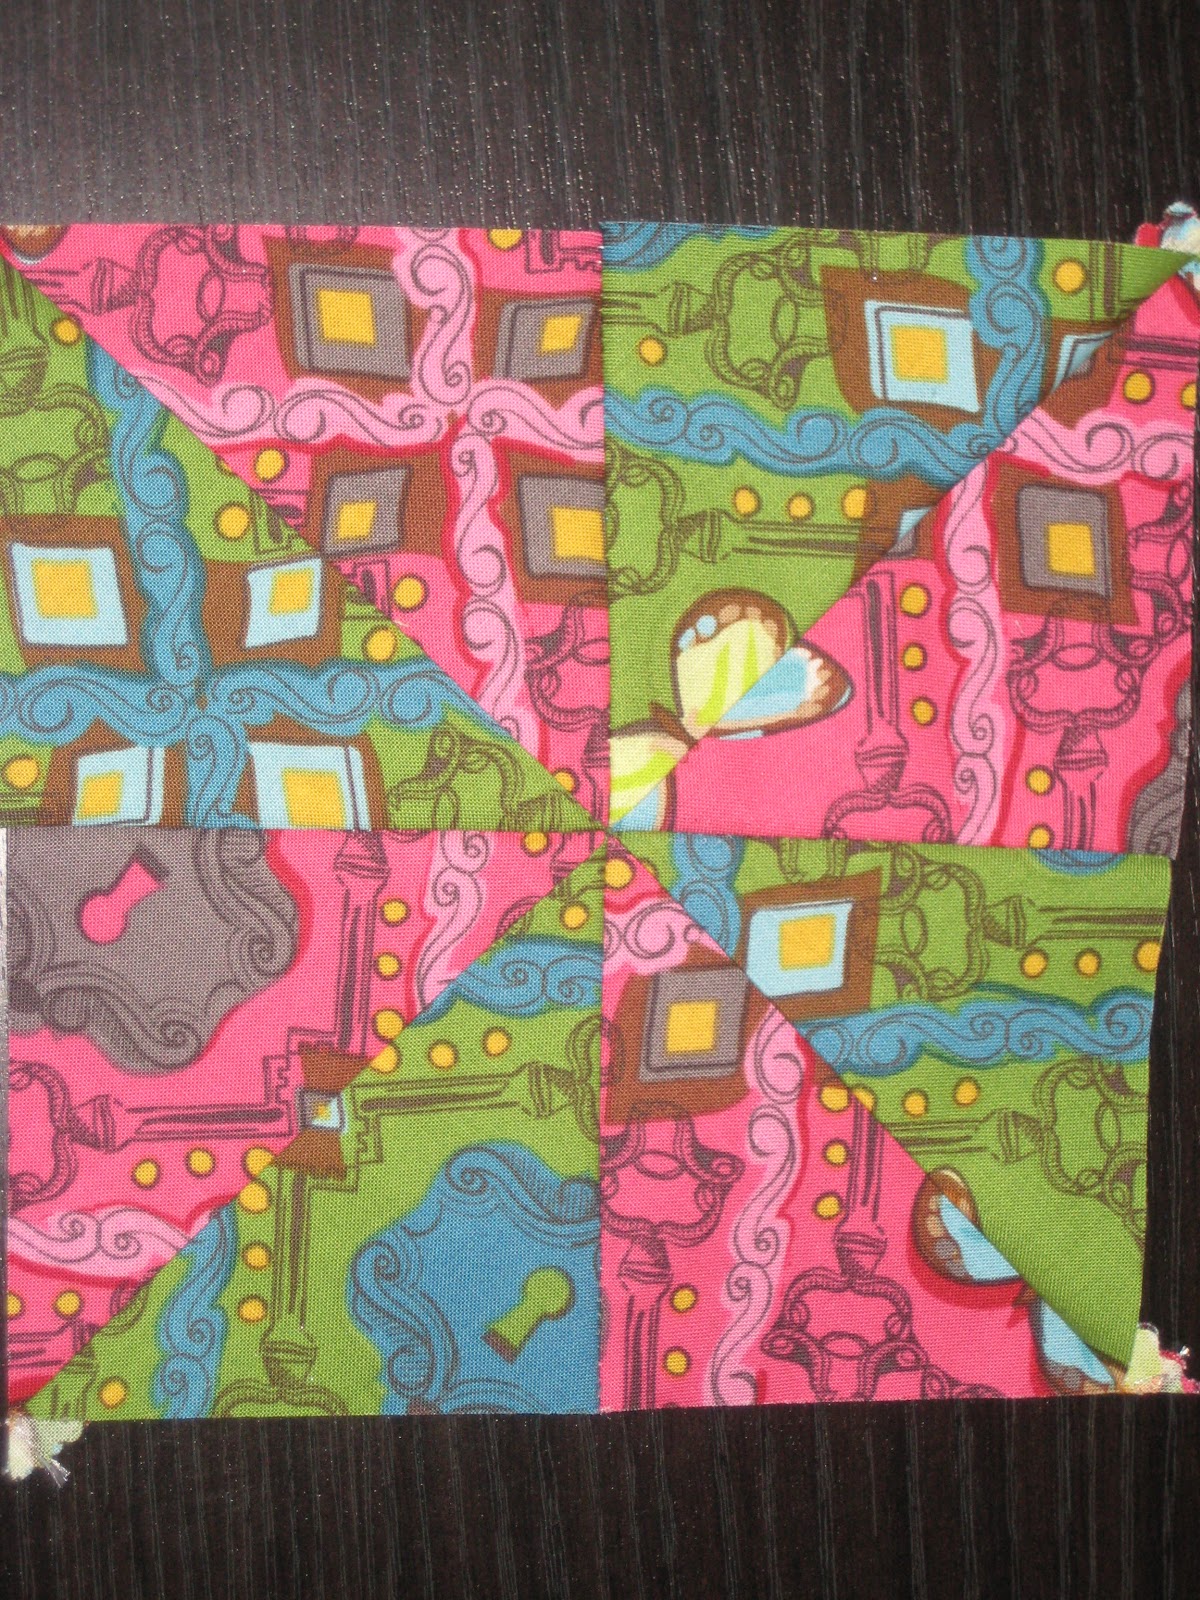
The mom that I made this for had picked the colors pink, purple and apple green for their theme, so with this in mind I took a trip to the fabric store (for this particular one I went to Hancock fabrics).  The full pink squares are silk, but the rest are a regular cotton blend.  I cut them into 6x6 squares
I pieced the blocks together into one row of 5, then added them to one side of a large piece of white fabric that had little designs on it.  Then I put together 4 blocks and attached it to the larger piece.  I repeated this 2 more times until I had squares going completely around the white piece.  I designed a pretty french themed chandelier with her name under it and used my embroidery machine to add it to the white part of the fabric. 


For the border, I went with a dark purple for a couple of reasons:

  1. The lady at the fabric store that commented on how pretty the quilt was looking (because I took it with me, to Joann's this time, to find something that matched) suggested a deep purple color. Her reason soon became my reason..
  2. the purple candles on the embroidered image matched it, and
  3. the purple looked really good against the green and pink
Then I attempted machine quilting.  Now, a video that I found of a lady who owns a quilt shop firmly believed that you should mail your quilt top into her to quilt for you (she has a big machine that does automatic designs so it takes the thinking out of the quilting part), but I wanted to do it myself! Since she wouldn't give me further advice on how to do it I came up with my own way.  I took a fabric marker (one that disappears after washing)  and drew a large stippling design with a few hearts in the middle and a loop-de-loop in a couple of places.  Then I dropped the feed dogs on my machine (the part that pushes the fabric through, giving you a nice even stitch) and traced the design.  I didn't trace it perfect, and I admit I totally messed up in a few areas, but it came out very nice for a first attempt! I totally suggest you try it! Then I had to tackle the binding, oh crap... Ok, so I googled how to do binding and found this blog that became my quilting lifesaver.  Now, with it finished I was able to step back and critique it. I messed up in a few areas with the quilting, and on top of that I guess I didn't put the needle over far enough because some of the squares were unraveling.  Now I know what to do better next time, and I am excited to figure out my new quilting adventure! Here's a few more pictures of the quilt. 

  I forgot to mention the cute, simple fabric that I found for the back.  It was super soft and I thought it went perfectly with the other side of the quilt.
 

On to the next one!

Confessions of a Craftaholic